API 5L Pipes for Pipelines Explained
API 5L SPECIFICATION
The API 5L specification covers pipes to conveying oil, gas, water in the petroleum, gas and water distribution industries. The API 5L specification latest edition can be read on the API website directly.
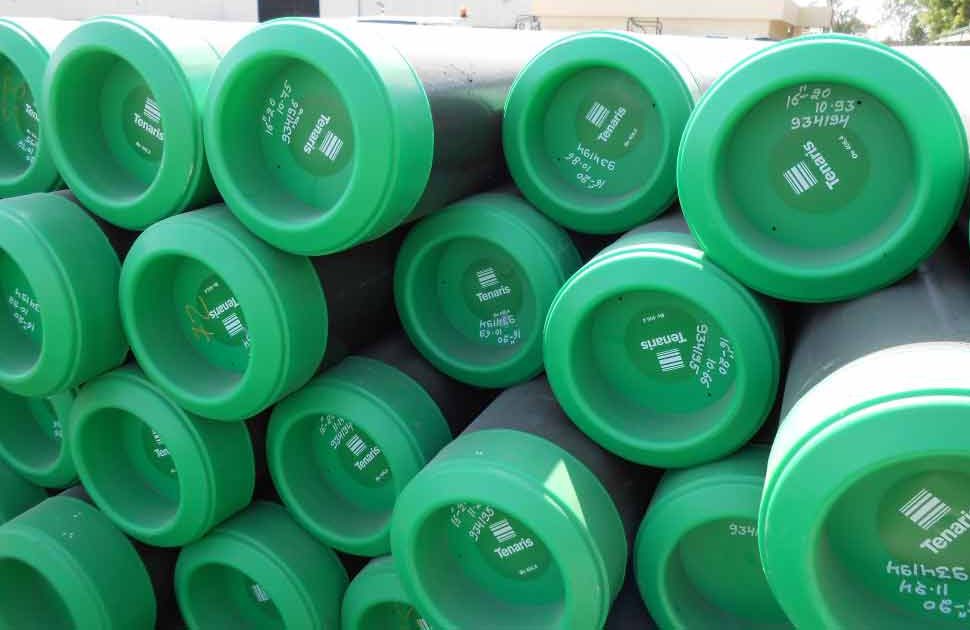
API 5L pipes may be classified according to the following criteria:
- execution: seamless or welded (seamless pipes may be used up to 24 inches, LSAW above 24 inches, ERW up to 20 inches)
- specification level (API PSL1, PSL2): PSL1 is a standard quality used for pipelines, whereas PSL2 sets more stringent chemical, mechanical properties, and testing requirements
- surface finish: black, varnish painted, anti-rust oil, galvanized, coated externally (3PL) and/or lined internally
- ends types: plain, beveled, threaded ends
The main advantages of API 5L pipe are:
- Resistance to cracking forces that may propagate in long pipelines
- Sour service suitability
- Rather inexpensive and long service life (at least grades B, X42)
Size Range
API 5L pipes are available in dimensions between from 2 to 28″ (seamless execution) and up to 80″ in welded execution (generally, LSAW i.e. longitudinal submerged arc welding).
The API 5L and ASME B36.10 pipe dimensions and weights are, in fact, identical.
API 5L PIPE CHEMICAL AND MECHANICAL PROPERTIES
The yield strength of an API 5L pipe is specified with the number that follows the X in the material grade designation (in kilopounds per square inch – i.e. KSI). So, for instance, an API 5L X52 pipe has a minimum yield strength of 52 KSI.
The table shows the chemical composition of API 5L steel pipes PSL1 and PSL2 from Grade A to Grade X70, as well as their mechanical properties.
Source: API 5L specification
| API 5L PIPE PSL1 Chemical and Mechanical Properties | |||||||||
| API 5L PIPE PSL1 | Chemical Composition | Mechanical Property | |||||||
| C (Max) | Mn (Max) | P (Max) | S (Max) | TENSILE ( Min ) | YIELD ( Min ) | ||||
| Psi X 1000 | Mpa | Psi X 1000 | Mpa | ||||||
| Grade A25 | CL I | 0.21 | 0.60 | 0.030 | 0.030 | 45 | 310 | 25 | 172 |
| CL II | 0.21 | 0.60 | 0.030 | 0.030 | |||||
| Grade A | 0.22 | 0.90 | 0.030 | 0.030 | 48 | 331 | 30 | 207 | |
| Grade B | 0.26 | 1.20 | 0.030 | 0.030 | 60 | 414 | 35 | 241 | |
| Grade X42 | 0.26 | 1.30 | 0.030 | 0.030 | 60 | 414 | 42 | 290 | |
| Grade X46 | 0.26 | 1.40 | 0.030 | 0.030 | 63 | 434 | 46 | 317 | |
| Grade X52 | 0.26 | 1.40 | 0.030 | 0.030 | 66 | 455 | 52 | 359 | |
| Grade X56 | 0.26 | 1.40 | 0.030 | 0.030 | 71 | 490 | 56 | 386 | |
| Grade X60 | 0.26 | 1.40 | 0.030 | 0.030 | 75 | 517 | 60 | 414 | |
| Grade X65 | 0.26 | 1.45 | 0.030 | 0.030 | 77 | 531 | 65 | 448 | |
| Grade X70 | 0.26 | 1.65 | 0.030 | 0.030 | 82 | 565 | 70 | 483 |
| API 5L PIPE PSL2 Chemical and Mechanical Properties | ||||||||||||
| API 5L PIPE PSL2 | Chemical Composition | Mechanical Property | ||||||||||
| C (Max) | Mn (Max) | P (Max) | S (Max) | Tensile | Yield | C. E. IMPACT ENERGY | ||||||
| Psi x 1000 | Mpa | Psi x 1000 | Mpa | PCM | IIW | J | FT/LB | |||||
| Grade B | 0.22 | 1.20 | 0.025 | 0.015 | 60 – 110 | 414 – 758 | 35 – 65 | 241 – 448 | 0.25 | 0.43 | T/L 27/41 | T/L 20/30 |
| Grade X42 | 0.22 | 1.30 | 0.025 | 0.015 | 60 – 110 | 414 – 758 | 42 – 72 | 290 – 496 | 0.25 | 0.43 | T/L 27/41 | T/L 20/30 |
| Grade X46 | 0.22 | 1.40 | 0.025 | 0.015 | 63 – 110 | 434 – 758 | 46 – 76 | 317 – 524 | 0.25 | 0.43 | T/L 27/41 | T/L 20/30 |
| Grade X52 | 0.22 | 1.40 | 0.025 | 0.015 | 66 – 110 | 455 – 758 | 52 – 77 | 359 – 531 | 0.25 | 0.43 | T/L 27/41 | T/L 20/30 |
| Grade X56 | 0.22 | 1.40 | 0.025 | 0.015 | 71 – 110 | 490 – 758 | 56 – 79 | 386 – 544 | 0.25 | 0.43 | T/L 27/41 | T/L 20/30 |
| Grade X60 | 0.22 | 1.40 | 0.025 | 0.015 | 75 – 110 | 517 – 758 | 60 – 82 | 414 – 565 | 0.25 | 0.43 | T/L 27/41 | T/L 20/30 |
| Grade X65 | 0.22 | 1.45 | 0.025 | 0.015 | 77 – 110 | 531 – 758 | 65 – 82 | 448 – 565 | 0.25 | 0.43 | T/L 27/41 | T/L 20/30 |
| Grade X70 | 0.22 | 1.65 | 0.025 | 0.015 | 82 – 110 | 565 – 758 | 70 – 82 | 483 – 565 | 0.25 | 0.43 | T/L 27/41 | T/L 20/30 |
| Grade X80 | 0.22 | 1.90 | 0.025 | 0.015 | 90 – 120 | 621 – 827 | 80 – 102 | 552 – 705 | 0.25 | 0.43 | T/L 27/41 | T/L 20/30 |
API 5L Equivalent Grades (ASTM, EN, DIN)
Material grades A53 Gr. B and A106 Gr. B, and also API 5L Gr. X42, are API 5L Gr. B equivalent. It is actually quite common to find on the market pipes that comply, at the same time, with all these specifications (“quadri-norm” marked pipes). While this is true in terms of chemical and mechanical properties, note that the API 5L specification sets more severe requirements and tests than those set for the two equivalent ASTM specifications.
In terms of comparison with EN pipe standards, API 5L Gr. B equivalents are EN 10216-1 P265GH (seamless) and EN 10217-1 P265 (welded) – whereas EN 10216-2 P265 GH is the EN equivalent grade for ASTM A106 Gr. B pipes.
| Line Pipe Materials: Werkstoff vs EN vs API | ||
|---|---|---|
| Werkstoff/DIN | EN | API |
| 1.0486 StE 285 | – | API 5L Grade X42 |
| 1.0562 StE 355 | P355N | API 5L Grade X52 |
| 1.8902 StE 420 | P420N | API 5L Grade X60 |
| 1.8905 StE 460 | P460N | API 5L Grade X70 |
| High Yield Steel Pipes | ||
| 1.0457 StE 240.7 | L245NB | API 5L Grade B |
| 1.0484 StE 290.7 | L290NB | API 5L Grade X42 |
| 1.0582 StE 360.7 | L360NB | API 5L Grade X52 |
| 1.8972 StE 415.7 | L415NB | API 5L Grade X60 |
| – – | – | – |
API 5L PSL1 VS. API 5L PSL2
API 5L PSL1 and PSL2 are two specification levels that differ in terms of chemical composition and test requirements. The differences between PSL1 and PSL2 are outlined in the two tables below:
| PSL GRADE | C, a | Mn a | P | S | Si | V | Nb | Ti | Other | CEIIW | CEpcm |
| 1 | 0.24 | 1.40 | 0.025 | 0.015 | 0.45 | 0.10 | 0.05 | 0.04 | b,c | .043 | 0.025 |
| 2 | 0.28 | 1.40 | 0.03 | 0.03 | – | b | b | b | – | – | – |
| Test Requirement | API 5L PSL1 | API 5L PSL2 |
| Charpy test | None required | Required for all grades |
| Seamless NDT test | Only if purchaser specifies SR4 | SR4 mandatory |
| Certification | Certificates when specified per SR15 | Certificates (SR 15.1) mandatory |
| Traceability | Traceable only until all tests are passed, unless SR15 is specified | Traceable after completion of tests (SR 15.2) mandatory |
| Hydrostatic Test | Required | Required |
API 5L PIPE SCHEDULE CHART
DIMENSIONAL RANGE
| NPS (in) | Outside Diameter (in) | API 5l Pipe Schedule | ||||||||||||
|---|---|---|---|---|---|---|---|---|---|---|---|---|---|---|
| SCH 10 | SCH 20 | SCH 30 | SCH STD | SCH 40 | SCH 60 | SCH XS | SCH 80 | SCH 100 | SCH 120 | SCH 140 | SCH 160 | SCH XXS | ||
| Wall Thickness (in) | ||||||||||||||
| 1/8 | 0.405 | 0.068 | 0.068 | 0.095 | 0.095 | |||||||||
| 1/4 | 0.540 | 0.088 | 0.088 | 0.119 | 0.119 | |||||||||
| 3/8 | 0.675 | 0.091 | 0.091 | 0.126 | 0.126 | |||||||||
| 1/2 | 0.840 | 0.109 | 0.109 | 0.147 | 0.147 | 0.187 | 0.294 | |||||||
| 3/4 | 1.050 | 0.113 | 0.113 | 0.154 | 0.154 | 0.219 | 0.308 | |||||||
| 1 | 1.315 | 0.133 | 0.133 | 0.179 | 0.179 | 0.250 | 0.358 | |||||||
| 1 1/4 | 1.660 | 0.140 | 0.140 | 0.191 | 0.191 | 0.250 | 0.382 | |||||||
| 1 1/2 | 1.900 | 0.145 | 0.145 | 0.200 | 0.200 | 0.281 | 0.400 | |||||||
| 2 | 2.375 | 0.154 | 0.154 | 0.218 | 0.218 | 0.344 | 0.436 | |||||||
| 2 1/2 | 2.875 | 0.203 | 0.203 | 0.276 | 0.276 | 0.375 | 0.552 | |||||||
| 3 | 3.500 | 0.216 | 0.216 | 0.300 | 0.300 | 0.438 | 0.600 | |||||||
| 3 1/2 | 4.000 | 0.226 | 0.226 | 0.318 | 0.318 | |||||||||
| 4 | 4.500 | 0.237 | 0.237 | 0.337 | 0.337 | 0.438 | 0.531 | 0.674 | ||||||
| 5 | 5.563 | 0.258 | 0.258 | 0.375 | 0.375 | 0.500 | 0.625 | 0.750 | ||||||
| 6 | 6.625 | 0.280 | 0.280 | 0.432 | 0.432 | 0.562 | 0.719 | 0.864 | ||||||
| 8 | 8.625 | 0.250 | 0.277 | 0.322 | 0.322 | 0.406 | 0.500 | 0.500 | 0.594 | 0.719 | 0.812 | 0.906 | 0.875 | |
| 10 | 10.750 | 0.250 | 0.307 | 0.365 | 0.365 | 0.500 | 0.500 | 0.594 | 0.719 | 0.844 | 1.000 | 1.125 | 1.000 | |
| 12 | 12.750 | 0.250 | 0.330 | 0.375 | 0.406 | 0.562 | 0.500 | 0.688 | 0.844 | 1.000 | 1.125 | 1.312 | 1.000 | |
| 14 | 14.000 | 0.250 | 0.312 | 0.375 | 0.375 | 0.438 | 0.594 | 0.500 | 0.750 | 0.938 | 1.094 | 1.250 | 1.406 | |
| 16 | 16.000 | 0.250 | 0.312 | 0.375 | 0.375 | 0.500 | 0.656 | 0.500 | 0.844 | 1.031 | 1.219 | 1.438 | 1.594 | |
| 18 | 18.000 | 0.250 | 0.312 | 0.438 | 0.375 | 0.562 | 0.750 | 0.500 | 0.938 | 1.156 | 1.375 | 1.562 | 1.781 | |
| 20 | 20.000 | 0.250 | 0.375 | 0.500 | 0.375 | 0.594 | 0.812 | 0.500 | 1.031 | 1.281 | 1.500 | 1.750 | 1.969 | |
| 22 | 22.000 | 0.250 | 0.375 | 0.500 | 0.375 | 0.875 | 0.500 | 1.125 | 1.375 | 1.625 | 1.875 | 2.125 | ||
| 24 | 24.000 | 0.250 | 0.375 | 0.562 | 0.375 | 0.688 | 0.969 | 0.500 | 1.219 | 1.531 | 1.812 | 2.062 | 2.344 | |
| 30 | 30.000 | 0.312 | 0.500 | 0.625 | 0.375 | 0.500 | ||||||||
| 32 | 32.000 | 0.312 | 0.500 | 0.625 | 0.375 | 0.688 | ||||||||
| 34 | 34.000 | 0.312 | 0.500 | 0.625 | 0.375 | 0.688 | ||||||||
| 36 | 36.000 | 0.312 | 0.500 | 0.625 | 0.375 | 0.750 | ||||||||
| 4 | 42.000 | 0.500 | 0.625 | 0.375 | 0.750 |
API 5L PIPE OUTSIDE DIAMETER TOLERANCE
| Specified outside diameter D mm (in) of API 5L Pipes | API 5L Diameter tolerances mm (in) | API 5L Out-of-roundness tolerances mm (in) | ||||
| Pipe except at end a | Pipe end a,b,c | Pipe except at end a | Pipe end a,b,c | |||
| SMLS pipe | Welded pipe | SMLS pipe | Welded pipe | |||
| < 60.3 (2.375) | – 0.8 (0.031 ) to + 0.4 (0.016) | – 0.4 (0.016) to + 1.6 (0.063) | d | |||
| ≥ 60.3 (2.375) to ≤ 168.3 (6.625) | ± 0.007 5 D | 0.020 D | 0.015 D | |||
| ≥ 168.3 (6.625) to ≤ 610 (24.00) | ± 0.007 5 D | ± 0.007 5 Dbut maximumof + 3.2 (0.125) | ± 0.005 D,but maximum of ± 1.6 (0.063) | |||
| > 610 (24.000) to ≤ 1 422 (56.00) | ± 0.01 D | ± 0.005 D,but maximumof + 4.0 (0.160) | ± 2.0 (0.079) | ± 1.6 (0.063) | 0.015 D | 0.01 D, |
| but maximum of 15 (0.6), | but maximum of 13 (0.5), | |||||
| for d / ts ≤ 75 | for d / ts ≤ 75 | |||||
| by agreement | by agreement | |||||
| for d / ts > 75 | for d / ts > 75 | |||||
| > 1 422 (56 000) | as agreed |
a — Pipe end includes a length of 100 mm (4.0 in) for each side
b — For SMLS pipe, the tolerances apply for 25.0 mm (0.984 in); tolerances for thicker pipes have to be as agreed.
c — For pipe with D219,1 mm (8.625 in) the diameter tolerance and the out-of-roundness tolerance may be determined by using the calculated inside diameter (the specified outside diameter minus two times the specified wall thickness) or measured inside diameter rather than the specified outside diameter
d — Included in the tolerance of the diameter
API 5L PIPE WALL THICKNESS TOLERANCE (WT)
| API 5L wall thickness t mm (in) | API 5L Pipes Tolerances a mm (in) mm (in) |
| API 5L SMLS pipe b | |
| ≤ 4,0 ( 0.157) | + 0,6 (0.024) – 0,5 (0.020) |
| > 4,0 ( 0.157) to < 25,0 (0.984) | + 0,150 – 0,125 |
| ≥ 25,0 (0.984) | +3,7 (0.146) or + 0,1 t whichever is the greater – 3,0 (0.120) or – 0,1 t whichever is the greater |
| API 5L Welded pipe c, d | |
| ≤ 5,0 (0.197) | ± 0,5 (0.020) |
| > 5,0 (0.197) to <15,0 (0.591 ) | ± 0, 1 t |
| ≥ 15,0 (0.591) | ±1,5 (0.060) |
| a — if the purchase order specifies a minus tolerance for wall thickness smaller than the applicable value given in this table, the plus tolerance for wall thickness shall be increased by an amount sufficient to maintain the applicable tolerance range. b — for pipe with D ≥ 355,6 mm (14.000 in) and t ≥ 25,0 mm (0.984 in) the wall thickness tolerance locally may exceed the plus tolerance for wall thickness by an additional 0,05 t, provided that the plus tolerance for mass (see 9.14) is not exceeded. c — The plus tolerance for wall thickness does not apply to the weld area. d — See 9.13.2 for additional restrictions. |
